**这是本文档旧的修订版!**
PCB布局布线
一旦完成了原理图的设计,通过ERC检查无误(没有Error、最好也没有Warning)、生成Netlist,就可以进入到下一步 - PCB Layout了,这个过程应该细分为元器件的Placement(布局)和信号线的Route(布线)两个环节,在实际的设计中Placement(布局)更重要,需要花费更多的时间,基于一系列的需求和规则对每个元器件在电路板上的位置进行认真的摆放,尤其是在大型的项目中,一定要待元器件的布局被相关的人确定以后,再开始信号线的连接,也就是布线的过程。布局和布线的过程基于信号完整性、电源完整性等方面的考虑不在本教程的探讨范围,在这里我们只看看KiCad这个工具如何实现布局和布线整个流程的。
我们将PCB Layout的过程也总结为按照顺序执行的10步:
- 按照项目的需求确定PCB板的物理大小、关键器件的位置、板子的层数并定义各层的功能
- 加载原理图生成的Netlist(网表),根据一系列的规则进行元器件的布局,可以通过3D视图查看板子的布局结构是否合理
- 根据PCB加工厂商的制造规范设定PCB的布线规则 - 线宽、线间距、过孔大小、丝印字体及大小等等
- 关键信号线走线 - 电源 、时钟、差分信号、敏感的模拟信号….
- 其它信号线走线
- 铺地/电源
- DRC检查
- 对照原理图上的连线逐线高亮检查
- 调整丝印
- 生成给PCB加工厂需要的Gerber文件
接下来我们来看看KiCad中的Pcbnew是如何执行这些过程的。
1. Pcbnew的使用
From the KiCad project manager, click on the Pcb layout editor icon pcbnewpng . The Pcbnew window will open. If you get an error message saying that a *.kicadpcb file does not exist and asks if you want to create it, just click Yes.
Begin by entering some schematic information. Click on the Page settings icon sheetset_png on the top toolbar. Set the appropriate paper size (A4,8.5×11 etc.) and title as Tutorial1.
It is a good idea to start by setting the clearance and the minimum track width to those required by your PCB manufacturer. In general you can set the clearance to 0.25 and the minimum track width to 0.25. Click on the Setup → Design Rules menu. If it does not show already, click on the Net Classes Editor tab. Change the Clearance field at the top of the window to 0.25 and the Track Width field to 0.25 as shown below. Measurements here are in mm.
从KiCad项目经理处,单击Pcb布局编辑器图标 。 Pcbnew窗口将打开。 如果您收到错误消息,指出*.kicad_pcb文件不存在并询问您是否要创建它,只需单击是。
首先输入一些原理图信息。 单击顶部工具栏上的页面设置图标 。 将适当的纸张尺寸(A4,8.5×11等)和标题设置为Tutorial1。
最好将间隙和最小轨道宽度设置为PCB制造商要求的宽度。 通常,您可以将间隙设置为0.25,将最小轨道宽度设置为0.25。 单击设置→设计规则菜单。 如果它尚未显示,请单击“网络类编辑器”选项卡。 将窗口顶部的“清除”字段更改为0.25,将“轨道宽度”字段更改为0.25,如下所示。 这里的测量单位是mm。
Design Rules Window
Click on the Global Design Rules tab and set Minimum track width to 0.25. Click the OK button to commit your changes and close the Design Rules Editor window.
Now we will import the netlist file. Click on the Read netlist icon netlist_png on the top toolbar. The netlist file tutorial1.net should be selected in the Netlist file field if it was created from Eeschema. Click on Read Current Netlist. Then click the Close button. All components should now be visible. They are selected and follow the mouse cursor.
Move the components to the middle of the board. If necessary you can zoom in and out while you move the components. Click the left mouse button.
单击“全局设计规则”选项卡,将“最小轨道宽度”设置为0.25。 单击“确定”按钮以提交更改并关闭“设计规则编辑器”窗口。
现在我们将导入网表文件。 单击顶部工具栏上的Read netlist icon  。 如果是从Eeschema创建的,则应在Netlist文件字段中选择网表文件tutorial1.net。 单击“读取当前网表”。 然后单击“关闭”按钮。
现在应该可以看到所有组件。 选择它们并按照鼠标光标。
将组件移动到板的中间。 如有必要,您可以在移动组件时放大和缩小。 单击鼠标左键。
All components are connected via a thin group of wires called ratsnest. Make sure that the Show/hide board ratsnest button generalratsnestpng is pressed. In this way you can see the ratsnest linking all components.
You can move each component by hovering over it and pressing [m]. Click where you want to place them. Alternatively you can select a component by clicking on it and then drag it. Press [r] to rotate a component. Move all components around until you minimise the number of wire crossovers. gsiktutorial1080_png
Note how one pin of the 100 ohm resistor is connected to pin 6 of the PIC component. This is the result of the labelling method used to connect pins. Labels are often preferred to actual wires because they make the schematic much less messy.
Now we will define the edge of the PCB. Select the Edge.Cuts layer from the drop-down menu in the top toolbar. Click on the Add graphic lines icon adddashedline_png on the right toolbar. Trace around the edge of the board, clicking at each corner, and remember to leave a small gap between the edge of the green and the edge of the PCB.
所有组件都通过称为ratsnest的一组细线连接。确保按下显示/隐藏板鼠标按钮 。通过这种方式,您可以看到ratnest链接所有组件。
您可以通过将每个组件悬停在其上并按[m]来移动它们。单击要放置它们的位置。或者,您可以通过单击选择组件然后拖动它。按[r]旋转组件。移动所有组件,直到最小化电线交叉的数量。

注意100欧姆电阻的一个引脚如何连接到PIC组件的引脚6。这是用于连接引脚的标记方法的结果。标签通常比实际的电线更受欢迎,因为它们使原理图更加杂乱。
现在我们将定义PCB的边缘。从顶部工具栏的下拉菜单中选择Edge.Cuts图层。单击右侧工具栏上的添加图形线图标 。跟踪电路板边缘,点击每个角落,并记住在绿色边缘和PCB边缘之间留一个小间隙。
Select the Edge.Cuts layer
Next, connect up all the wires except GND. In fact, we will connect all GND connections in one go using a ground plane placed on the bottom copper (called B.Cu) of the board.
Now we must choose which copper layer we want to work on. Select F.Cu (PgUp) in the drop-down menu on the top toolbar. This is the front top copper layer.
接下来,连接除GND之外的所有电线。 事实上,我们将使用放置在电路板底部铜线(称为B.Cu)上的接地层一次连接所有GND连接。
现在我们必须选择我们想要处理的铜层。 在顶部工具栏的下拉菜单中选择F.Cu(PgUp)。 这是前顶部铜层。
Select the Front top copper layer
If you decide, for instance, to do a 4 layer PCB instead, go to Setup → Layers Setup and change Copper Layers to 4. In the Layers table you can name layers and decide what they can be used for. Notice that there are very useful presets that can be selected via the Preset Layer Groupings menu.
Click on the Route tracks icon addtrackspng on the right toolbar. Click on pin 1 of J1 and run a track to pad R2. Double-click to set the point where the track will end. The width of this track will be the default 0.250 mm. You can change the track width from the drop-down menu in the top toolbar. Mind that by default you have only one track width available.
例如,如果您决定使用4层PCB,请转到设置→图层设置并将铜图层更改为4.在图层表中,您可以命名图层并确定它们的用途。 请注意,可以通过“预设图层分组”菜单选择非常有用的预设。
单击右侧工具栏上的Route tracks图标 。 单击J1的第1针并运行轨道以填充R2。 双击以设置轨道结束的点。 此轨道的宽度将默认为0.250 mm。 您可以从顶部工具栏的下拉菜单中更改轨道宽度。 请注意,默认情况下,您只有一个可用的轨道宽度。
pcbnewselecttrackwidthpng
If you would like to add more track widths go to: Setup → Design Rules → Global Design Rules tab and at the bottom right of this window add any other width you would like to have available. You can then choose the widths of the track from the drop-down menu while you lay out your board. See the example below (inches).
如果要添加更多轨道宽度,请转到:设置→设计规则→全局设计规则选项卡,然后在此窗口的右下角添加您希望可用的任何其他宽度。 然后,您可以在布置电路板时从下拉菜单中选择轨道的宽度。 请参见下面的示例(英寸)。
customtrackswidth_png
Alternatively, you can add a Net Class in which you specify a set of options. Go to Setup → Design Rules → Net Classes Editor and add a new class called power. Change the track width from 8 mil (indicated as 0.0080) to 24 mil (indicated as 0.0240). Next, add everything but ground to the power class (select default at left and power at right and use the arrows).
If you want to change the grid size, Right click → Grid. Be sure to select the appropriate grid size before or after laying down the components and connecting them together with tracks.
Repeat this process until all wires, except pin 3 of J1, are connected. Your board should look like the example below.
或者,您可以添加一个Net Class,在其中指定一组选项。 转到设置→设计规则→网络类编辑器,然后添加一个名为power的新类。 将轨道宽度从8密耳(表示为0.0080)更改为24密耳(表示为0.0240)。 接下来,将除地面之外的所有内容添加到功率等级(在左侧选择默认值,在右侧选择电源并使用箭头)。
如果要更改网格大小,请右键单击→网格。 在放下组件并将它们与轨道连接在一起之前或之后,请务必选择合适的网格尺寸。
重复此过程,直到连接除J1的引脚3之外的所有电线。 您的电路板应如下所示。
gsiktutorial1090_png
Let’s now run a track on the other copper side of the PCB. Select B.Cu in the drop-down menu on the top toolbar. Click on the Route tracks icon addtrackspng . Draw a track between pin 3 of J1 and pin 8 of U1. This is actually not necessary since we could do this with the ground plane. Notice how the colour of the track has changed.
Go from pin A to pin B by changing layer. It is possible to change the copper plane while you are running a track by placing a via. While you are running a track on the upper copper plane, right click and select Place Via or simply press [v]. This will take you to the bottom layer where you can complete your track.
现在让我们在PCB的另一个铜侧上运行轨道。 在顶部工具栏的下拉菜单中选择B.Cu。 单击Route tracks图标 。 在J1的引脚3和U1的引脚8之间画一条轨道。 这实际上没有必要,因为我们可以用地平面做到这一点。 注意轨道的颜色是如何变化的。
通过更改图层从引脚A转到引脚B. 通过放置通道可以在运行轨道时更改铜平面。 当您在上部铜平面上运行轨道时,右键单击并选择“放置Via”或只需按[v]。 这会将您带到底层,您可以在其中完成曲目。
placeavia_png
When you want to inspect a particular connection you can click on the Highlight net icon nethighlightpng on the right toolbar. Click on pin 3 of J1. The track itself and all pads connected to it should become highlighted.
Now we will make a ground plane that will be connected to all GND pins. Click on the Add filled zones icon addzonepng on the right toolbar. We are going to trace a rectangle around the board, so click where you want one of the corners to be. In the dialogue that appears, set Default pad connection to Thermal relief and Outline slope to H,V and 45 deg only and click OK.
Trace around the outline of the board by clicking each corner in rotation. Finish your rectangle by clicking the first corner second time. Right click inside the area you have just traced. Click on Zones→'Fill or Refill All Zones'. The board should fill in with green and look something like this:
如果要检查特定连接,可以单击右侧工具栏上的突出显示网络图标 。 点击J1的第3针。 轨道本身和连接到它的所有打击垫都应突出显示。
现在我们将制作一个连接到所有GND引脚的接地层。 单击右侧工具栏上的“添加填充区域”图标addzonepng。 我们将在棋盘周围跟踪一个矩形,因此单击您想要其中一个角的位置。 在出现的对话框中,将默认打击垫连接设置为“热释放”并将“轮廓坡度”设置为仅限H,V和45度,然后单击“确定”。
通过单击旋转中的每个角来跟踪板的轮廓。 通过第二次单击第一个角完成矩形。 右键单击您刚刚跟踪的区域。 单击区域→'填充或重新填充所有区域'。 董事会应填写绿色,看起来像这样:
Run the design rules checker by clicking on the Perform design rules check icon drc_png on the top toolbar. Click on Start DRC. There should be no errors. Click on List Unconnected. There should be no unconnected items. Click OK to close the DRC Control dialogue.
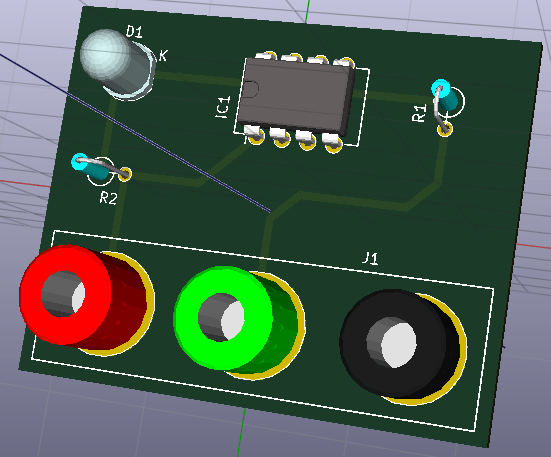
Save your file by clicking on File → Save. To admire your board in 3D, click on View → 3D Viewer.
单击顶部工具栏上的执行设计规则检查图标drc_png,运行设计规则检查器。 单击Start DRC。 应该没有错误。 单击List Unconnected列表。 应该没有未连接的项目。 单击“确定”关闭“DRC控制”对话框。
单击文件→保存以保存文件。 要以3D方式欣赏您的电路板,请单击视图→3D查看器。
You can drag your mouse around to rotate the PCB.
Your board is complete. To send it off to a manufacturer you will need to generate all Gerber files.
2. 生成和查看Gerber文件
一旦PCB设计完成,就可以为每一层生成Gerber文件,并将它们发给你要打板的PCB制板厂。
从KiCad中打开Pcbnew电路板编辑器,点击File(文件) → Plot(光绘). 光绘的格式选择Gerber,并选定你要输出的所有Gerber文件的文件夹,点击Plot(光绘)按钮。
要生成drill file(钻孔文件), 从Pcbnew里再执行一次File(文件) → Plot(光绘)选项. 按照首选的设置即可.
对于2层板,你需要选定如下的一些层的:
| 层 | KiCad层的名字 | 首选的Gerber扩展名 | 打开“用Protel文件扩展名” |
|---|---|---|---|
| Bottom Layer | B.Cu | .GBR | .GBL |
| Top Layer | F.Cu | .GBR | .GTL |
| Top Overlay | F.SilkS | .GBR | .GTO |
| Bottom Solder Resist | B.Mask | .GBR | .GBS |
| Top Solder Resist | F.Mask | .GBR | .GTS |
| Edges | Edge.Cuts | .GBR | .GM1 |
要查看所有Gerber文件,可以使用KiCad工程管理器中的GerbView功能。 在下拉菜单或图层管理器中,选择图层1. 单击File(文件)→ Open Gerber Files(打开Gerber文件)或单击图标 。 选择并打开所有生成的Gerber文件。 注意它们如何一个在另一个上面显示。
使用File→Open Excellon Drill File打开钻孔文件。
使用右侧的图层管理器选择/取消选择要显示的图层。 在发送到制板厂之前,要仔细检查每一层是否正确。
3. 使用FreeRouting自动布线
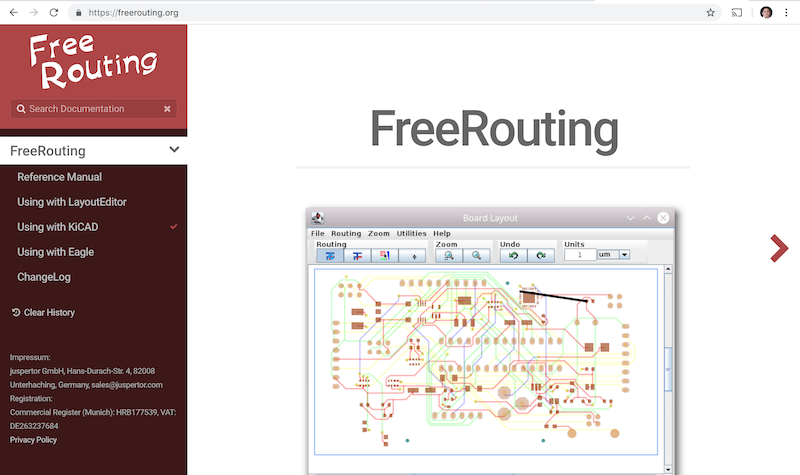
手工布线既快速又有趣,但对于具有大量器件的电路板,您可能希望使用自动布线器。请记住,您应首先手动对关键的信号布线,然后剩余的非关键但比较无聊的信号线可以让机器自动布线。它只会对还没有布线的信号进行自动连接。在这里可以使用的自动布线器是FreeRouting。

注:FreeRouting是一个开源的Java应用程序。目前FreeRouting有多种不同的版本,你可以在网上搜索“freerouting”,就会找到源代码或已经编译好的Java包,根据你自己的情况选择合适的格式使用。
- 从Pcbnew单击 File(文件)→ Export(导出)→ Specctra DSN, 保存文件到本地目录。启动FreeRouter并单击Open Your Own Design(打开你自己的设计)按钮,浏览dsn文件并加载它。
- FreeRouter具有KiCad目前不具备的一些功能,包括手动布线和自动布线。 FreeRouter主要有两个步骤:首先,对电路板进行布线,然后对其进行优化。完全优化可能需要很长时间,你可以随时停止它。
- 您可以通过单击顶部栏上的Autorouter(自动布线器)按钮来启动自动布线。底栏显示正在进行的布线过程。如果下面的“通过计数”已经超过30,意味使用自动布线很难步通你的板子,你可以调整板子上的器件位置,给出更多的布线空间再试一下。
- 左键单击鼠标可以停止自动布线并自动启动优化过程,再一次左键单击将停止优化过程。除非你真的需要停下来,最好让FreeRouter完成整个的自动布线过程。
- 单击File(文件)→导出 Specctra Session File菜单,并使用.ses扩展名保存电路板文件。FreeRouter规则文件没有必要保存。
- 回到Pcbnew。单击File(文件)→Import(导入)→ Specctra Session,选择.ses文件进行导入。
如果你对自动布线生成的任何连线不满意,可以删除掉再对其布线。
4. KiCad中的前向标注 - 对已经完成的设计进行修改
完成电路原理图设计、封装分配、电路板布局、布线并生成了Gerber文件,就可以将所需的文件发送给PCB制造商将设计变成实际的电路板了。
通常这种工作流程并非一直是单向的。有时在你已经完成所有设计流程以后,出于种种原因,你不得不再修改或扩展你的设计 - 比如调整器件的位置、替换某些器件、更改占用空间等等。这个修改过程你当然不想全部重新来过,例如你想在完成了原理图和PCB布局布线的工程设计中用CON2替换连接器CON1。比较合理的方法如下:
- 保存工程 - 返回原理图编辑器,单击File(文件) → Save Whole Schematic Project(保存整个原理图工程)保存项目,关闭原理图编辑器。
- 调整新器件的布局 - 此时,你应该看到先前布线好的器件以及左上角还未布线的器件,在我们的例子中也就是是CON2。用鼠标选择CON2,将该器件移动到电路板中间。
- 更新布线并保存 - 摆放好CON2并对其布线。完成布线后保存文件并生成新的Gerber文件。
这个“前向标注”的过程可以根据需要重复去做。还有另一种称为后向标注的方法允许工程师从Pcbnew修改已经布线好的PCB,进而在原理图和网表文件中更新这些修改。但Backward Annotation(后向标注)的方法不是太常用,在这里也就不再介绍了。


